When Chloe first started coloring and doing crafts, we cherished every one and found somewhere to display it. With two preschoolers in the house suddenly we are overwhelmed with artwork and creations. While I still take time to admire each one, I no longer want to keep them or display them all. So what do you do?
Designate an area (or areas) for displaying art.
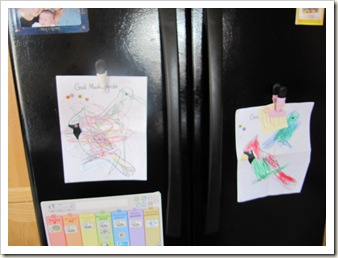
The Fridge – We have one grip clip on the front of our fridge for each of the children and they can display one thing on that clip. If they want to put up a new creation, the old one has to come down. This helps keep fridge door clutter to a minimum.
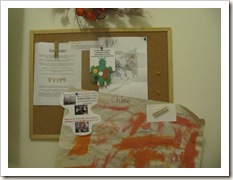
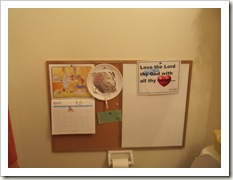
The Bulletin Board – In our laundry room, I also have a small bulletin board. On it I have a few verses and inspirational quotes and a few pieces of art. We also have a small board in our downstairs powder room. They can each display one thing on there as well.
Magnetic Board – We also have a magnetic board on our wall in the play area. We don’t display pictures on it but rather have our magnetic letters etc. on it to keep the fridge free. A magnetic board is a great option if you are concerned about tacks and push pins. Ikea has some really great, inexpensive magnetic board options.
A Clothesline – In Chloe’s room we have a little DIY clothesline that she loves to display art on as well. John doesn’t have one in his room as of yet. He isn’t as interested in displaying his work as Chloe is.
 Chloe’s bedroom art clothesline
Frames – There are those special creations that just beg to be framed. Choose them wisely. Something that is a big hit with our little ones is our Ikea rimless frames for finger painting creations. They’re larger and easy to change out. We could have them hang on the walls but for now they just sit on the top of their book case in their rooms.
There are lots more great ideas for displays if you look around online. Using fabric and ribbons you could make a pin free message board etc. What do you use?
Determine Capacity
Once you find something that will work for you, determine it’s capacity and then stick with it. One picture, five, ten? Decide the limit and then enforce it. Once it reaches capacity, then something has to go before a new creation can come in. You could first one in, first one out or choose your least favorite, oldest etc. to replace. As your tots get a little older, enlist his or her help for deciding which pieces are display-worthy.
Storing
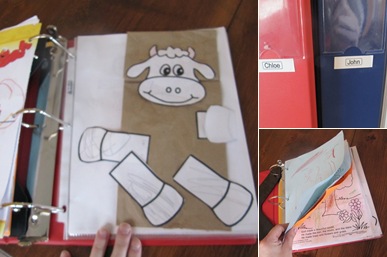
Binder – Artwork on display will most likely be “un-displayed” at some point. Most of these creations you will part with (see below) but a few really will be worth saving. It’s good to save a few pieces (or more) each year so that you and your child can look back and see the progress they’ve made. I don’t remember where I first read about the idea of binders but Chloe was a year old when I implemented it. We have a 2” binder for each child. It has several page protectors in it. When we have a piece we’d like to save, I write the name, date and any descriptions that Chloe or John have given me on the back and then either hole-punch it (coloring pages) or slide it into a page protector (like her first ever craft – a paper bag cow puppet) in the binder. This binder is ALL the artwork I plan to save for them in their life so we’re selective. Again, for our family this is only a few key pieces each year.
Take a Picture – Taking a picture then making a photo book with your pictures may be a good option for your family. Or put it on CD. Both take up much less space.
Bankers Box – If you have a lot of crafts you wish to save, perhaps a study box is the way to go.
Art Portfolio – My husband keeps his collected art in a portfolio, you could do the same for children’s work too.
Scrapbook – you could scrapbook it. I have no talent in this area but perhaps this is your area of talent?
So many options but I think they key is labeling, dating and moderation! If you have a good storage idea, I’d love to hear it!
Parting with Artwork
You’re likely to have a whole lot of spare artwork. Chloe especially has a very hard time if she sees her artwork in the garbage or recycling bin. We’ve started doing a few things that I’ll share today.
Recycle it – Though if you have an emotional little person like me, I suggest you do this secretly.
Give it to relatives – Nana is great and always seems excited to be the recipient of artwork. Whether they trash it or recycle it, it’s no longer your issue.
Mail it to seniors – we have a couple of “shut-in” seniors in our church. We try to send out little notes and cards to them and it’s always nice to add in some artwork too.
Make it into Christmas cards, gifts or ornaments. Using Popsicle sticks you can made a little frame, trim artwork to fit, add a ribbon and hang on your tree or give as a gift. So many great ideas…what do you do with yours?
Final Thoughts
Remember that you aren’t parting with the memories of making these crafts with your children, just the crafts themselves. It doesn’t mean you don’t love your child or appreciate his/her hard work. Also remember that everything you keep, your child will some day be saddled with. Make sure it’s worth it!
Think about whether or not it’s fair to keep everything they’ve ever done and then pass it off to them when they are grow, with the knowledge that their mother has saved this for years and years…
What tips to you have for displaying, storing and parting with children’s artwork?
- This post links to Works for Me Wednesday

I made a display wall out of super cheap thrift store frames that is working out really well. I took out the glass and added wire with tiny clothespins so that I can change out the artwork…. You can see it here:
http://ondogwoodlane.blogspot.com/2011/01/creativity-overflows.html
I love your ideas of things to do with artwork besides recycling or trashing it. I have a huge stack of things that I know we can’t keep forever. Now I have options besides the recycling bin!
I recently came across the most adorable way to save and display artwork. Save it by scanning it into your computer, then display multiple works in one beautiful display by creating a collage or poster of the scanned images.
Like this: http://pinterest.com/pin/17745197/
or this: http://pinterest.com/pin/15978722/
I can’t wait to do this with my kids’ creations!
I have created fabric using my daughter’s artwork on an American site called Spoonflower. I have also made wrapping paper, necklace charms and nighlights. Once you scan the art, there are so many possibilities. Its endless and fun. Check out http://www.buddingartists.ca for most ideas. You can connect to my blog from there. Thanks for the post. I’ll share it with my network.
@Maria @ Sarah – I am definitely going to look into these. Those are really neat ideas that I have never heard of!! Thanks so much for sharing today!